10 Tips for Photographing the Northern Lights

The Aurora Borealis, aka the Northern Lights, are one of most spectacular displays of nature one can witness in their lifetime. These beautiful dancing lights in the sky, glowing with vibrant colors, shapes and textures are high on many peoples bucket list, especially photographers. So, when you find yourself in a location where there is an opportunity to photograph the northern lights, you want to be as well prepared as you can! Here are my top ten tips for not only photographing the lights, but also having a general understanding for how to forecast them to give yourself the best chances possible.

Tip #1: Your Location Matters
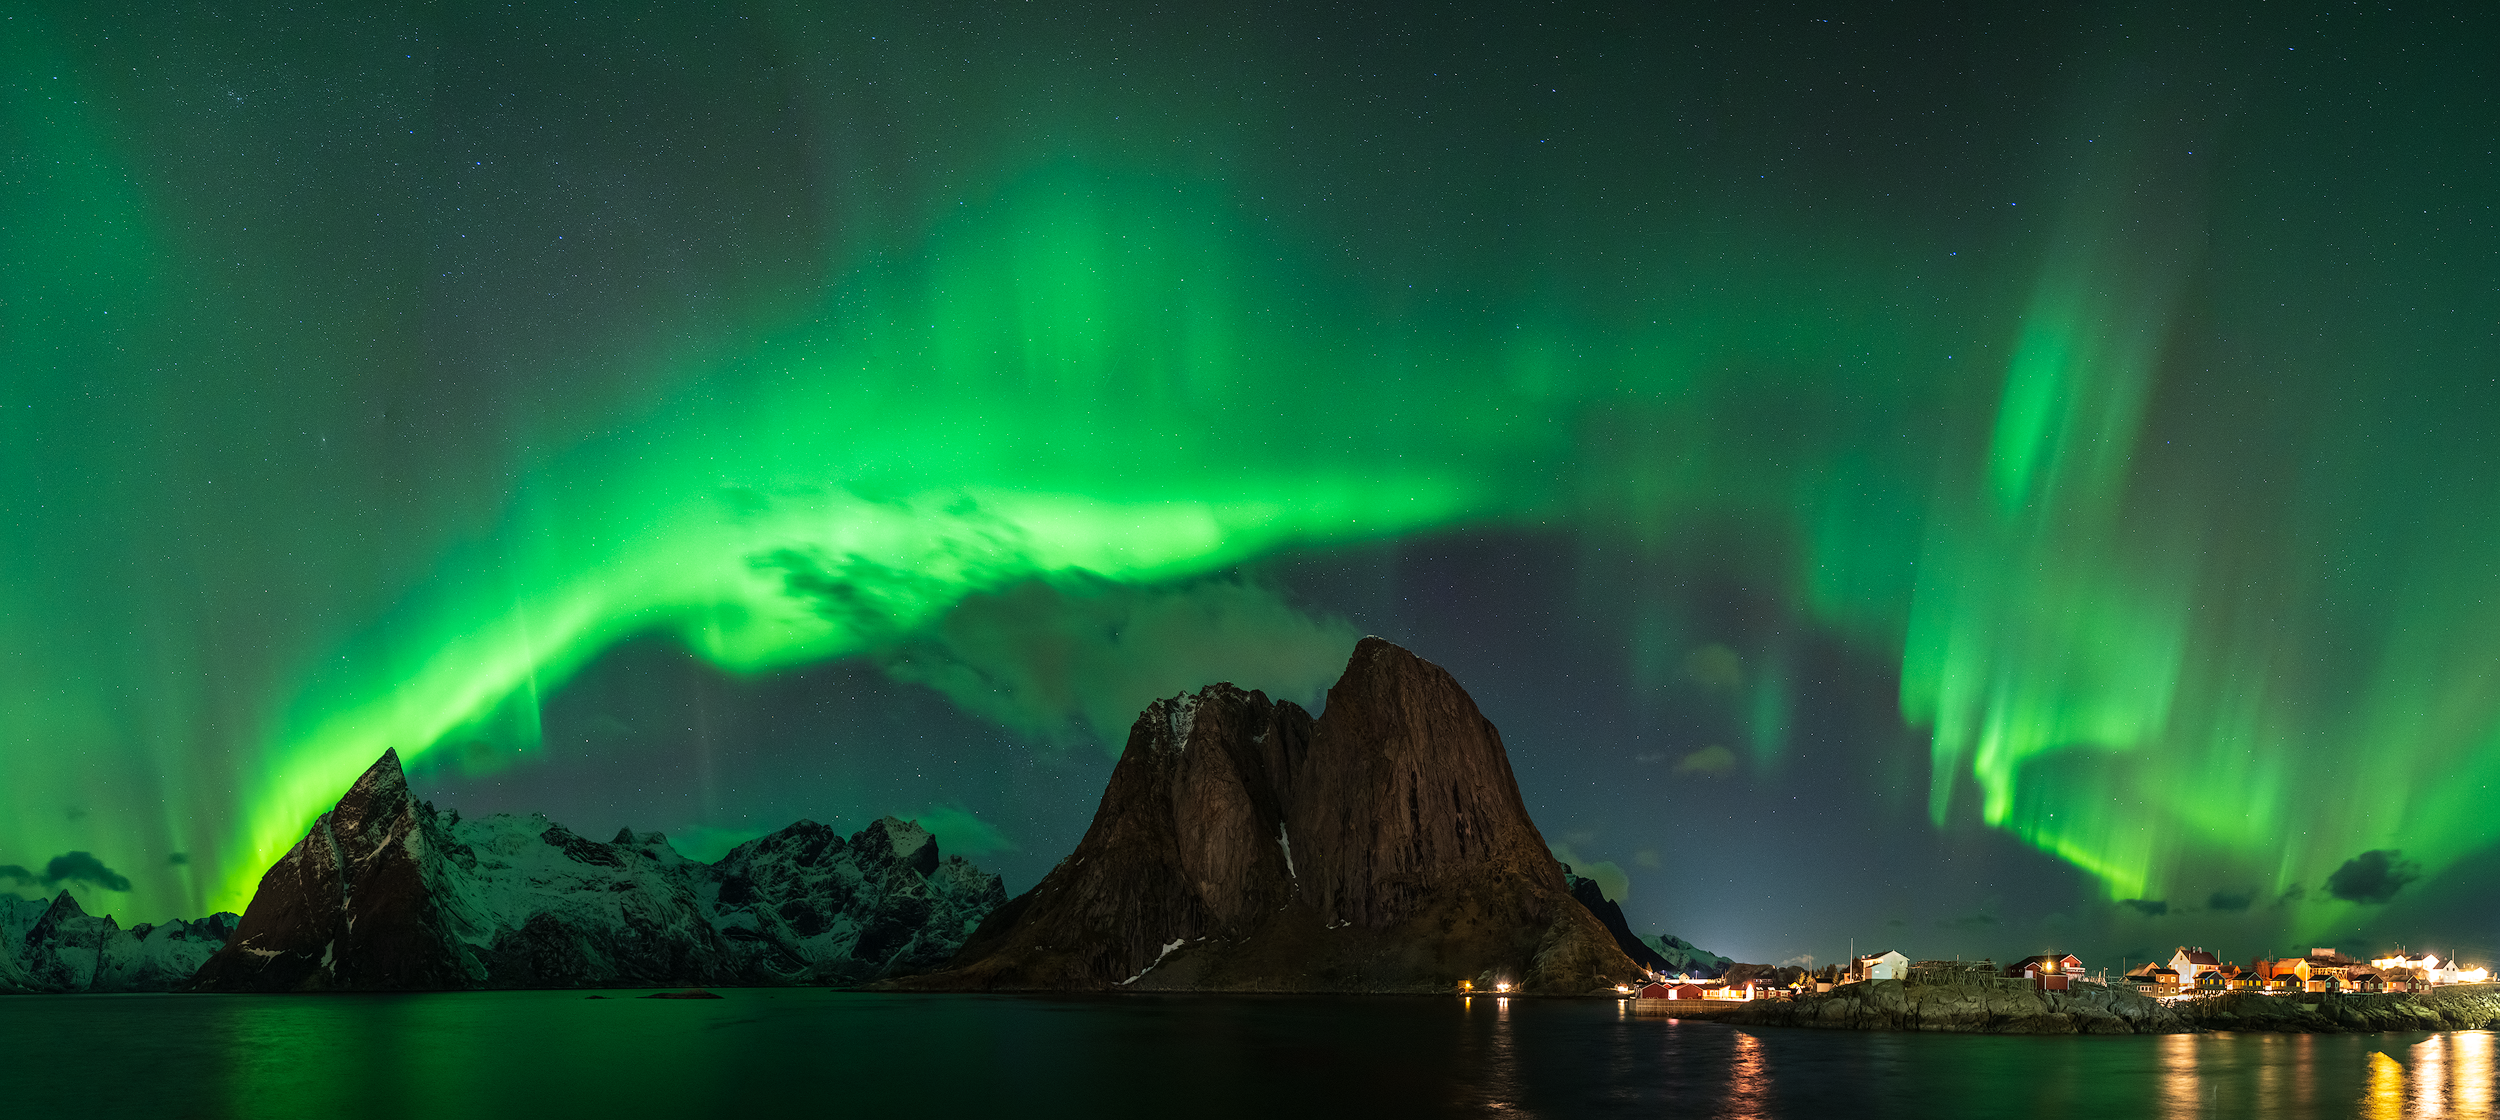
The Northern Lights don’t get their name from appearing just anywhere in the world (yes, I’m aware of the Southern Lights, but let’s stay focused here). If you’re wanting to give yourself a good chance to see these beauties, you must get north. Typically, this means putting yourself at least above 62ºN Latitude. Locations like Iceland, Greenland, the Yukon Territories of Canada, and Lofoten, Norway are fantastic starting places. Lofoten, Norway just happens to be where I lead my northern lights workshops due to its stunning fjords, high latitude, and rather clear nights. I find that locations south of 62ºN really struggle to receive good light shows without incredibly strong solar storms. Even then, the aurora can still struggle to be more than just a glow on the horizon. If you’re wanting to witness the lights dance over your head, you need to be north. Try to consider locations where there may be interesting foregrounds as well to include with the displays and help give your images some dimension.

Tip #2: Patience Is Key
Attempting to photograph the northern lights sure can be a test of your patience. From cloud cover to weak solar activity, there are indeed factors that can challenge your success rate. But patience is key. The lights can turn on and off like the flip of a switch. I’ve seen it many times, where the sky goes from a blank canvas to full of multiple bands of lights dancing around, and then you blink, and the sky seemingly goes dark again. If you have partly cloudy or clear skies, go out and be patient. This may mean sitting in your car listening to your favorite cassette tape or outside in the cold for hours on end, but what’s the saying, “you can’t win unless you play?” I like to bring a nice warm cup of cocoa with me and then just sit out under the stars. Also, stay off your phone, let your eyes adjust to the darkness of the night sky.

Tip #3: Avoid Light Pollution and Plan for The Moon Phase
Dark skies are your friend when looking for the lights. If you’re way far north, odds are you’re quite a ways away from light pollution, but there’s still cities you want to avoid. For instance, don’t go to Iceland and sit in Reykjavik waiting to see the lights. If they’re out, you’ll have a hard time seeing them due to the city lights washing out the sky. Get as far away from large sources of light as you can. With that being said, you definitely want to plan for the moon phase as well. Now typically many night photographers don’t want any moon in the sky (new moon) so they can get the largest quantity of stars in their frame. For me, I actually like a bit of moonlight with my northern lights shots. Why? Well, it helps illuminate the beautiful fjords, waterfalls and mountains that I like to incorporate into my imagery. New moons give you the darkest skies, but you have a hard time seeing any foreground in complete darkness. I try to plan around a quarter to half-moon phase if possible. This is enough ambient light to illuminate landscapes but not wash out the aurora.

Tip #4: Utilize Space Weather Data
Without going into a complete science lesson, there are a few measurements of data that you can look at to get an understanding of whether you’ll be able to see the aurora. The first is the KP Index. This goes from 0-9 and the higher the number, the further south the aurora may be visible at. For example, in Lofoten, a KP of 1-2 is all it takes to see the aurora glowing on the horizon. A KP of 2-3 will usually give you a good chance of seeing them dance above your head. In southern Iceland, A KP of 3 will give you the aurora on the horizon or just above, but a KP of 4 can bring the lights overhead. In Banff, Canada, it takes a KP of 4-5 to see the lights on the horizon, and a KP of 6 or higher for a show above. Now the KP Index needs to play well with other factors as well. You will also want to take into consideration at least two other pieces of data, the BZ and the hemispheric power. You will always want the BZ to be pulling south. This will really allow the aurora to be pushed further south from the pole and give you increasing chances of seeing it. The hemispheric power (HP) is a good way to interpret just how active the lights may be. A HP of 0-20 is a good sign that not much is happening. An HP of 20-50 means that you may be starting to get a show, especially at high latitudes. An HP of 50-80 equals pants for sure on and camera in hand. Anything higher than that, please don’t even consider sitting inside. The best website that I can share with you all for this data at the time of writing this article is www.spaceweatherlive.com.

Tip #5: Lens Options
Even though the aurora can be quite bright, you will definitely want to try and have a wide-angle lens with an aperture of at least F2.8. I typically shoot my aurora images with two lenses, the Nikkor Z 14-24mm F2.8 and the Nikkor Z 20mm F1.8. These low f-stops allow you to really open up your lens, allowing in as much light as possible, which yields faster shutter speeds and/or lower ISO’s.

Tip #6: Really Think About Your Settings
I often relate photographing the aurora to photographing a waterfall. You have two ways to photograph a waterfall. One way is with a fast shutter speed to freeze the motion of the water. And the second is with a slower shutter speed to create a silky-smooth look to the water. The aurora can move quite quickly, shaking and dancing across the sky, or, it can sit amongst the stars not really moving, just glowing up there quietly lurking above, judging each one of us, wondering why in the heck so many cameras are pointed at it. Sorry, got a little carried away there. But yes, it can move quickly or slowly, and that’s where you need to think. Think about how you want to convey your frame to your audience. If the aurora is moving fast and the pillars are vibrant and prominent, go with a faster shutter speed to freeze them (ex. 6”). This will then result in you raising your ISO to compensate for the loss of light. If your aurora is just sitting there, you can go with a longer shutter speed (ex. 25”) and a bit lower ISO to draw out the color and band. Either situation, you want to make sure your aperture is set as low as possible. That’s pretty much your constant, while your shutter and ISO are your variables. A good starting point is an ISO of 2000-4000, F2.8 or lower, and 10”-20”. Bonus Thought: Your white balance can be set to 3700 Kelvin to help cool those night skies off and really give you a good look at the colors within the aurora.

Tip #7: Don’t Be Afraid to Shoot Vertical
Not all aurora displays are created equal! You’ll see that sometimes the curtains and pillars remain lower on the horizon, but sometimes they can stretch overhead. When this happens, I like to try and experiment with vertical orientations. This allows me to capture more of the sky and still include a bit of the landscape. An L-Bracket for your camera is extremely beneficial in these situations as it allows you to quickly change the orientation of your camera in a matter of seconds without having to adjust your tripod.

Tip #8: Auto Focus & Noise Reduction – Turn It Off
These are two settings you will want to make sure you turn off. Auto focus does no good when photographing at night. You will want to utilize manual focus + Live View to get your focus. You can focus on a distant light, planet or even the moon by using your zoom in/out keys to hone in on that target and then manually focus. Please remember to get your focal length first before focusing. If you focus, then change your focal length, you will ruin the focus. You will also want to turn off Long Exposure Noise Reduction. Even though you will indeed be shooting at high ISO’s, you want to shoot your next frame as quickly as possible. By having NR turned on, it doubles your wait time. What I mean by that is that if you are shooting a 10” exposure, once the exposure is done, it takes your camera an additional 10” to render out the dark frame. So that equals 20” total for one image. That may not seem like a long time but seconds matter with the aurora as it changes so rapidly.
Tip #9: Experiment with Timelapses
The aurora is alive, and one issue with still images is that you cannot convey the motion the aurora has. It can swirl, pulse, shake, brighten, change colors and more. Much of this is lost in a still, so after you get a handful of images you are happy with, try timelapsing. These clips are a great way to show your audience just how wild the skies are above you!

Tip #10: Sit Back and Enjoy the Show!
YES! You heard me. Put the camera down (or leave it timelapsing…two birds, one stone) and watch what nature is capable of! I’ve seen the aurora dozens of times, but my fondest memories of it are when I just lay back on the ground and stare up, watching in complete awe.
If you would like to check off the aurora borealis from your bucket list and create some amazing images of it as well, I invite you to join me on my newest workshop for 2024, Arctic Landscapes & The Northern Lights in Lofoten, Norway. This will take place in February 2024, prime time for the aurora!